Difference between revisions of "Tutorials:Create cheat table full:coordinates"
m |
Exterminator (talk | contribs) m (→Find an injection point: Typo fixed) |
||
| (6 intermediate revisions by 2 users not shown) | |||
| Line 4: | Line 4: | ||
This page is a sub page of: [[Tutorials:Create_cheat_table_full|Creating a cheat table - Full guide]] | This page is a sub page of: [[Tutorials:Create_cheat_table_full|Creating a cheat table - Full guide]] | ||
| + | |||
| + | |||
| + | === Step 1 === | ||
When searching for coordinates we really don't know what the values are, but we can bet that they are floating points and in most games it will be single precision. | When searching for coordinates we really don't know what the values are, but we can bet that they are floating points and in most games it will be single precision. | ||
| − | So it's easiest to search for the Y coordinate, | + | So it's easiest to search for the Y coordinate, I bet that if we move up it will increase and that if we move down it will decrease. |
| Line 40: | Line 43: | ||
[[File:Tutorials.Dishonored.Coord.03.png|border]] | [[File:Tutorials.Dishonored.Coord.03.png|border]] | ||
| − | If you are standing still then do an increased or decreased scan and see a bunch of red values in the found list then with out moving after last scan set the scan type to ''unchanged value'' and click '' | + | If you are standing still then do an increased or decreased scan and see a bunch of red values in the found list then with out moving after last scan set the scan type to ''unchanged value'' and click ''next scan''. |
[[File:Tutorials.Dishonored.Coord.04.png|border]] | [[File:Tutorials.Dishonored.Coord.04.png|border]] | ||
| Line 58: | Line 61: | ||
[[File:Tutorials.Dishonored.Coord.05.png|border]] | [[File:Tutorials.Dishonored.Coord.05.png|border]] | ||
| − | + | === Step 2 === | |
Now from here I add the results the address list and organize then as best I can. | Now from here I add the results the address list and organize then as best I can. | ||
| Line 93: | Line 96: | ||
[[File:Tutorials.Dishonored.Coord.09.png|border]] | [[File:Tutorials.Dishonored.Coord.09.png|border]] | ||
| + | |||
| + | |||
| + | === Step 3 === | ||
Now let's move the address and add some addresses that are '-4' and '-8' from the original, you can just copy the first and you will get a prompt so enter the address change and click paste. | Now let's move the address and add some addresses that are '-4' and '-8' from the original, you can just copy the first and you will get a prompt so enter the address change and click paste. | ||
| Line 107: | Line 113: | ||
Now let's find a good injection point that only accesses the player coordinates. | Now let's find a good injection point that only accesses the player coordinates. | ||
| − | So select the X Coordinate address and press ''F5'', move around in game then click ''stop'' on that debugger, | + | So select the X Coordinate address and press ''F5'', move around in game then click ''stop'' on that debugger. I tend to look for code with a full offset (i.e.: 4 bytes), and that is called constantly but not to often (like code that accesses the address 50 times a second). |
| + | |||
| + | Then in the memory view form, see what addresses get accessed by the instruction. Do this but right clicking the code line in the memory viewer and select ''Find out what addresses this instruction accesses''. | ||
[[File:Tutorials.Dishonored.Coord.12.png|border]] | [[File:Tutorials.Dishonored.Coord.12.png|border]] | ||
| − | Now here is where I like to add the instruction to the code list just for quick access to find the coordinates, just name it some thing like 'X Coord. Hook', maybe add ' | + | Now here is where I like to add the instruction to the code list just for quick access to find the coordinates, just name it some thing like 'X Coord. Hook', maybe add 'DO NOT REPLACE:' if needed, but I always use scripts to change game code. With the instruction stored and the table saved now if the game crashes (or we restart it) we should be able to easily find the coordinates again. Just know if the game is updated then the entries in the code list may not work any more. You can add temporary scripts with AOB scans to store the base for easy finding and debugging, if needed. |
| + | |||
| + | Or you could just add the instructions static address to the address list. If you did an AOB scan, and you get that down to one, add the found result to the address list (Tip: Use a description that tells you what value is accessed and the game version, and add that to a group in the address list and give the group a description like "Debug", "Notes", "Value Accessors", or "Value Accessors for Game Version: 0.0.0.0"). | ||
[[File:Tutorials.Dishonored.Coord.13.png|border]] | [[File:Tutorials.Dishonored.Coord.13.png|border]] | ||
| Line 125: | Line 135: | ||
| − | + | ||
| − | + | {{Tutorials:Create_cheat_table_full:links}} | |
| − | |||
| − | |||
Latest revision as of 23:01, 14 April 2019
This page is a sub page of: Creating a cheat table - Full guide
Step 1[edit]
When searching for coordinates we really don't know what the values are, but we can bet that they are floating points and in most games it will be single precision.
So it's easiest to search for the Y coordinate, I bet that if we move up it will increase and that if we move down it will decrease.
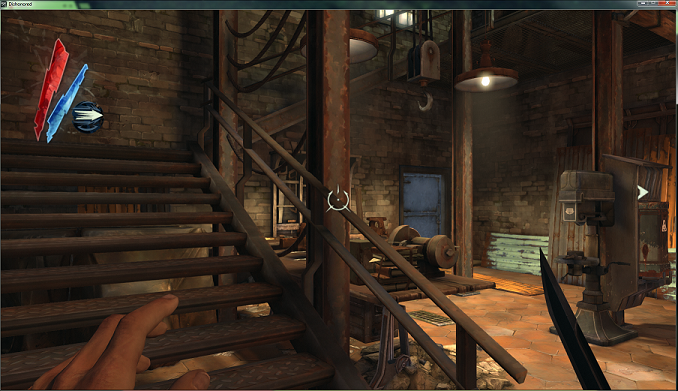
So start some where low that you can climb to a higher location later.
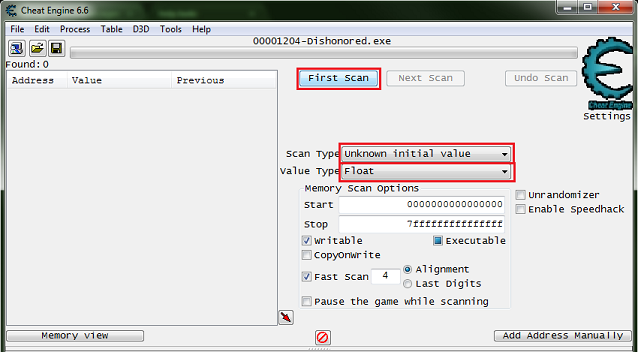
So let's start with setting the value type to float then the scan type to unknown initial value and click first scan.
Tip: Pause the game while scanning, in game pause, or check the pause the game while scanning check box. I prefer in game pause most of the time.
Now this will give a large number of found results but none will show up in the found list.
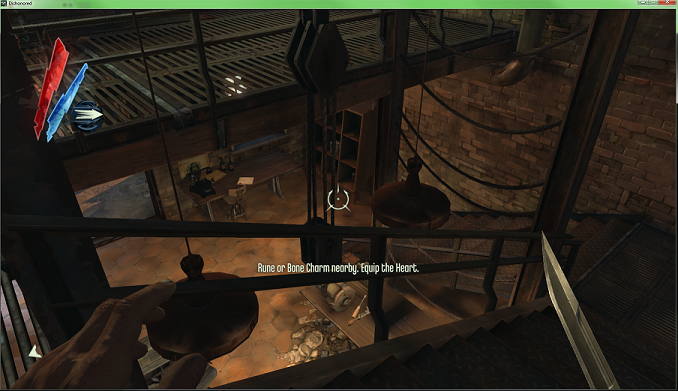
So now we need to climb to a higher spot.
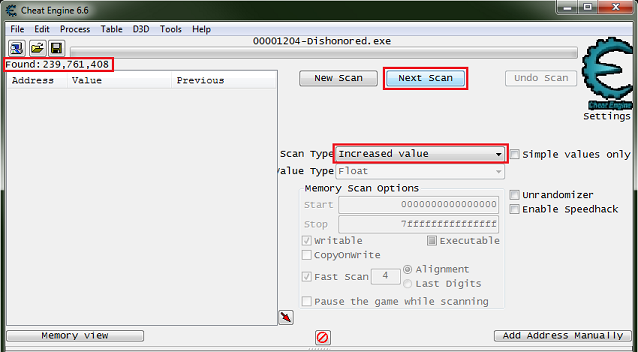
Then set the scan type to increased value and click next scan.
Now move back down to a lower point.
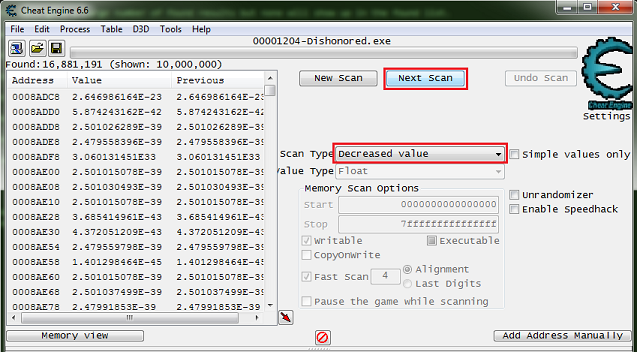
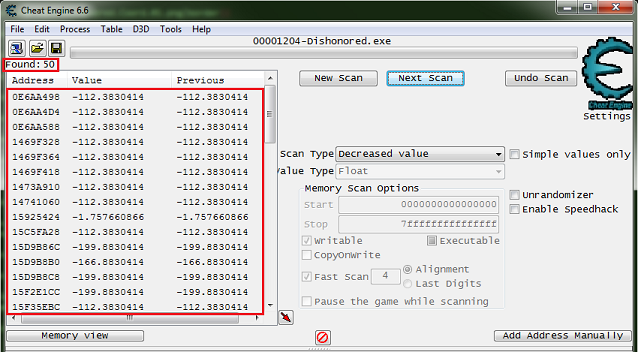
Then set the scan type to decreased value and click next scan.
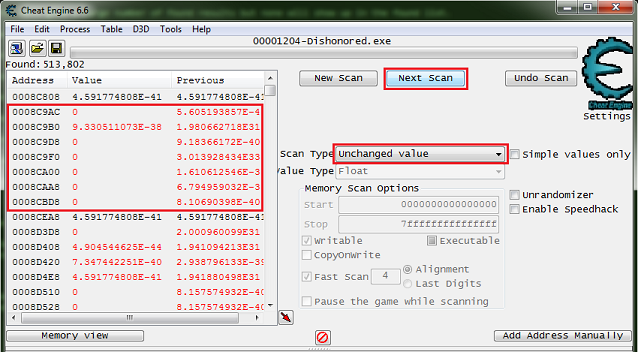
If you are standing still then do an increased or decreased scan and see a bunch of red values in the found list then with out moving after last scan set the scan type to unchanged value and click next scan.
Tip: Set hot-keys for increased value, decreased value, and unchanged value scans to keep from needed to leave the game for scans.
Tip: Move to other locations and do strait drops, to help reducing the results.
Now we will keep scanning for increased and decreased values until we weed down the list a bit.
Step 2[edit]
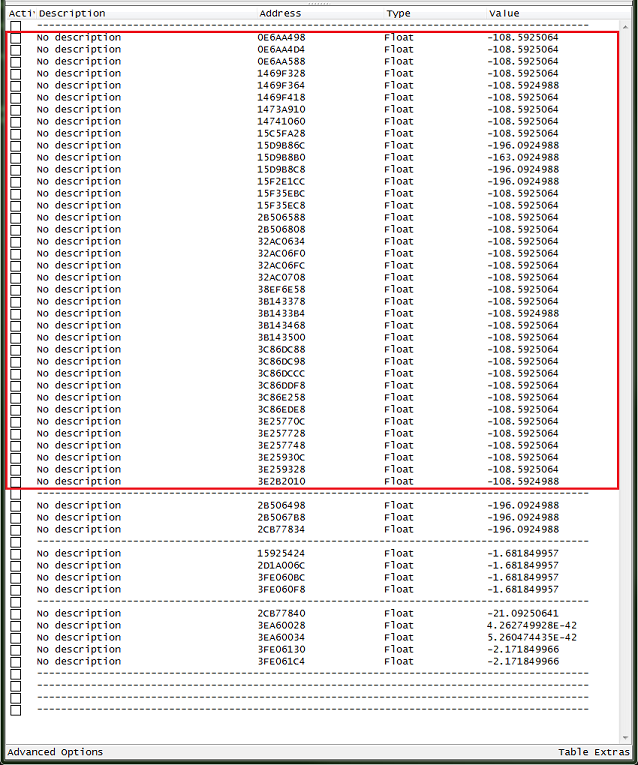
Now from here I add the results the address list and organize then as best I can.
After organizing I'm betting that the value is around '-108'. This is based on the thought that the player coordinates will be used in many calculations, so I would think there would be more addresses for these calculations.
Now let's move to a good spot to walk off and see if we stay in the air or repeatedly fall, when we freeze some addresses.
You may find that some of the value need reorganizing.
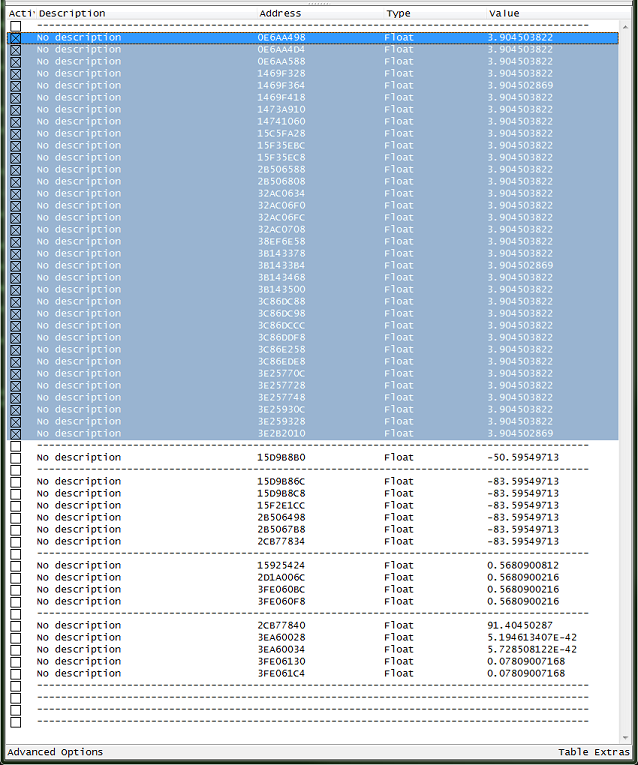
So now let's freeze all of the values that look best to see if we found what we are looking for.
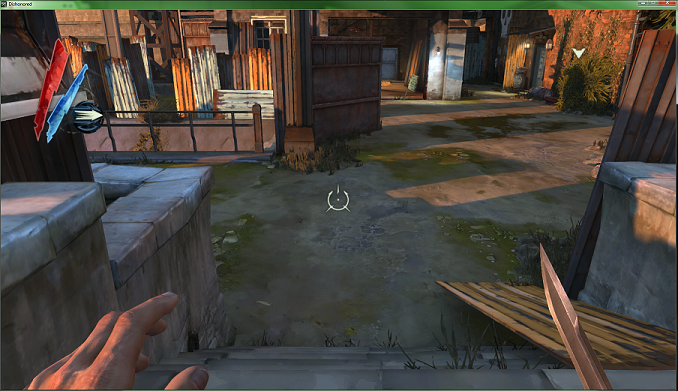
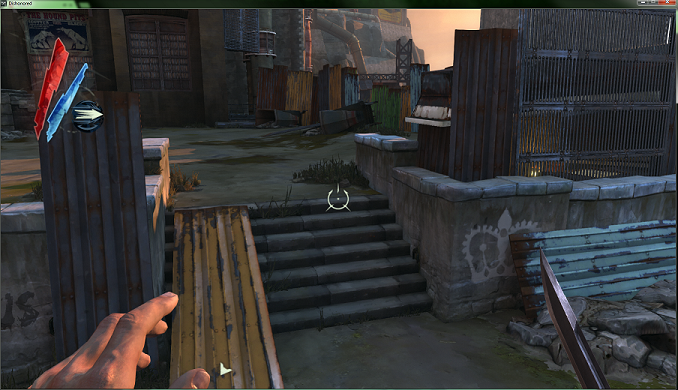
Then I will walk off the stairs to see if one of the frozen addresses are the right one.
Note: I tried from to high the first time (I wanted the picture of me floating to be obvious). I died and had to start over, but this kind of thing just happens, so rescanned and got back to this point.
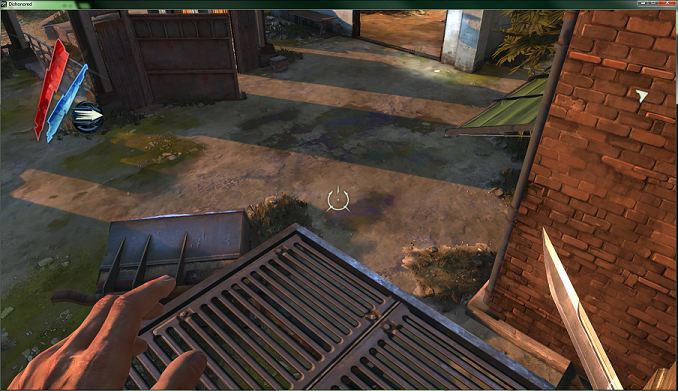
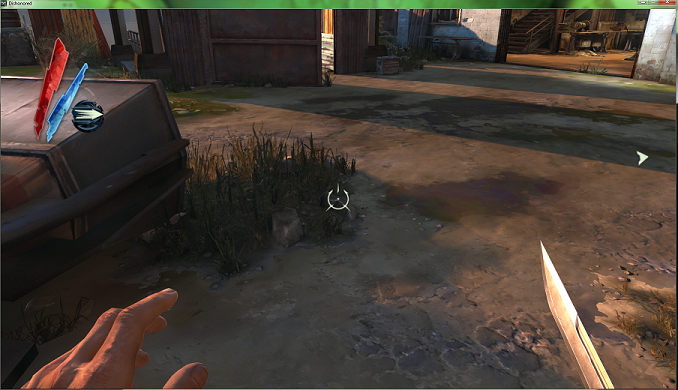
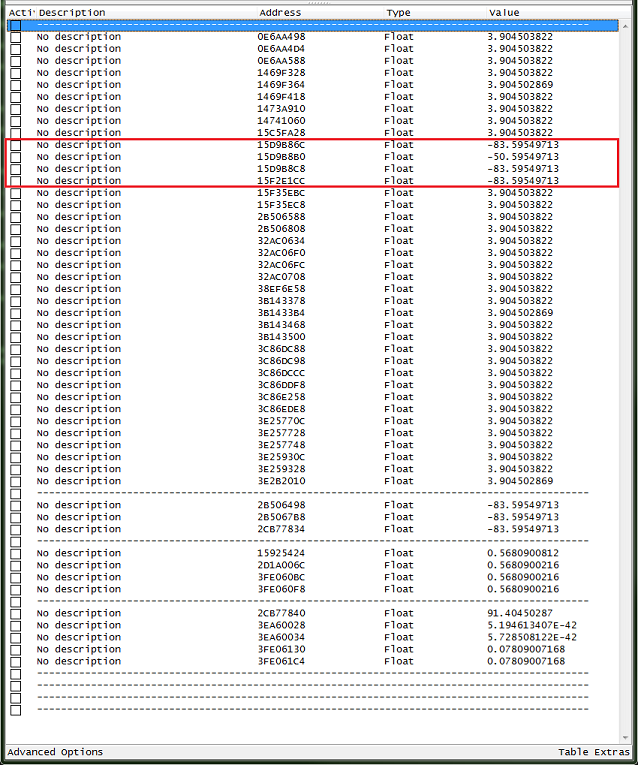
Here I continuously fall when walking and when stopped I float, I'm floating in the above picture.
So now just freeze the addresses in groups to break it down then freeze individually to find the right address, until one is found.
Step 3[edit]
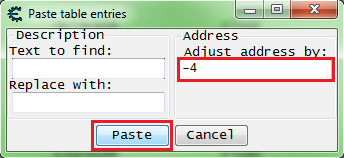
Now let's move the address and add some addresses that are '-4' and '-8' from the original, you can just copy the first and you will get a prompt so enter the address change and click paste.
Then we can rearrange them in order, and we should have some thing like this.
Find an injection point[edit]
Now let's find a good injection point that only accesses the player coordinates.
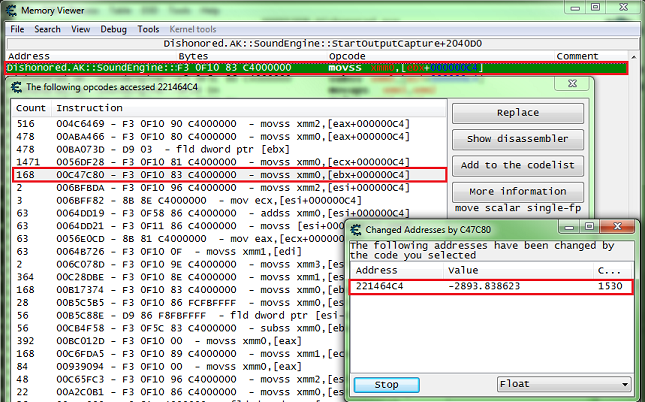
So select the X Coordinate address and press F5, move around in game then click stop on that debugger. I tend to look for code with a full offset (i.e.: 4 bytes), and that is called constantly but not to often (like code that accesses the address 50 times a second).
Then in the memory view form, see what addresses get accessed by the instruction. Do this but right clicking the code line in the memory viewer and select Find out what addresses this instruction accesses.
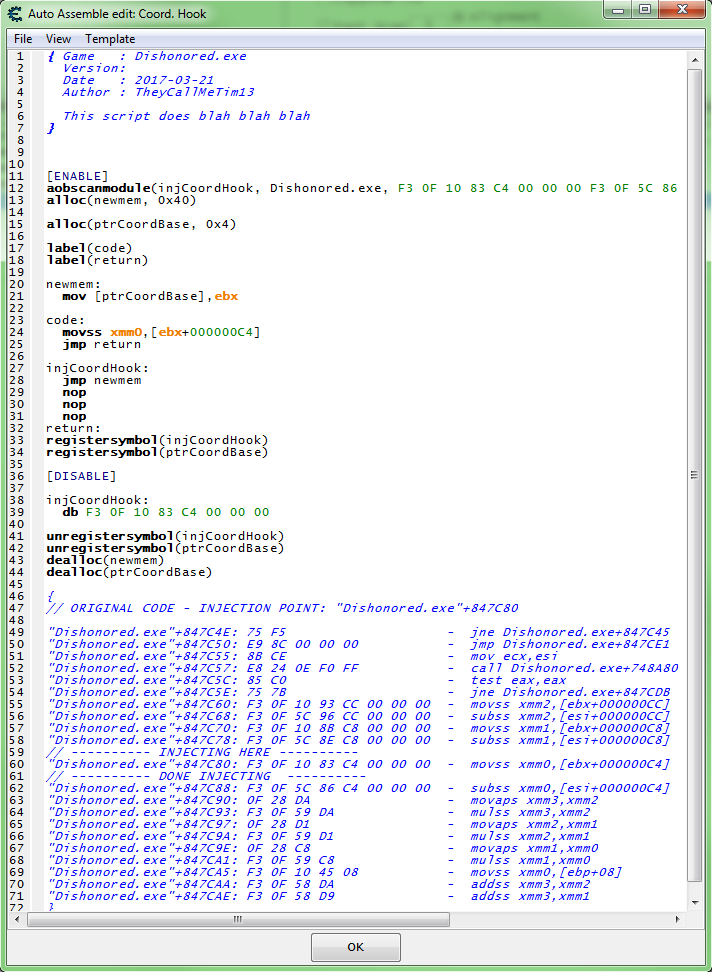
Now here is where I like to add the instruction to the code list just for quick access to find the coordinates, just name it some thing like 'X Coord. Hook', maybe add 'DO NOT REPLACE:' if needed, but I always use scripts to change game code. With the instruction stored and the table saved now if the game crashes (or we restart it) we should be able to easily find the coordinates again. Just know if the game is updated then the entries in the code list may not work any more. You can add temporary scripts with AOB scans to store the base for easy finding and debugging, if needed.
Or you could just add the instructions static address to the address list. If you did an AOB scan, and you get that down to one, add the found result to the address list (Tip: Use a description that tells you what value is accessed and the game version, and add that to a group in the address list and give the group a description like "Debug", "Notes", "Value Accessors", or "Value Accessors for Game Version: 0.0.0.0").
Just use the auto assembler templates for the scripts.
So let's try and find a base address for the player.
